“The Ancient Japanese Art of repairing things with gold“
Many wonder what is Kintsugi? and for some it is nothing more than just a Japanese technique to repair old porcelain that has been broken. However, this is not the case and it goes much further, to the point of being an art that has its roots in Ancient Japan at the end of the 15th century.
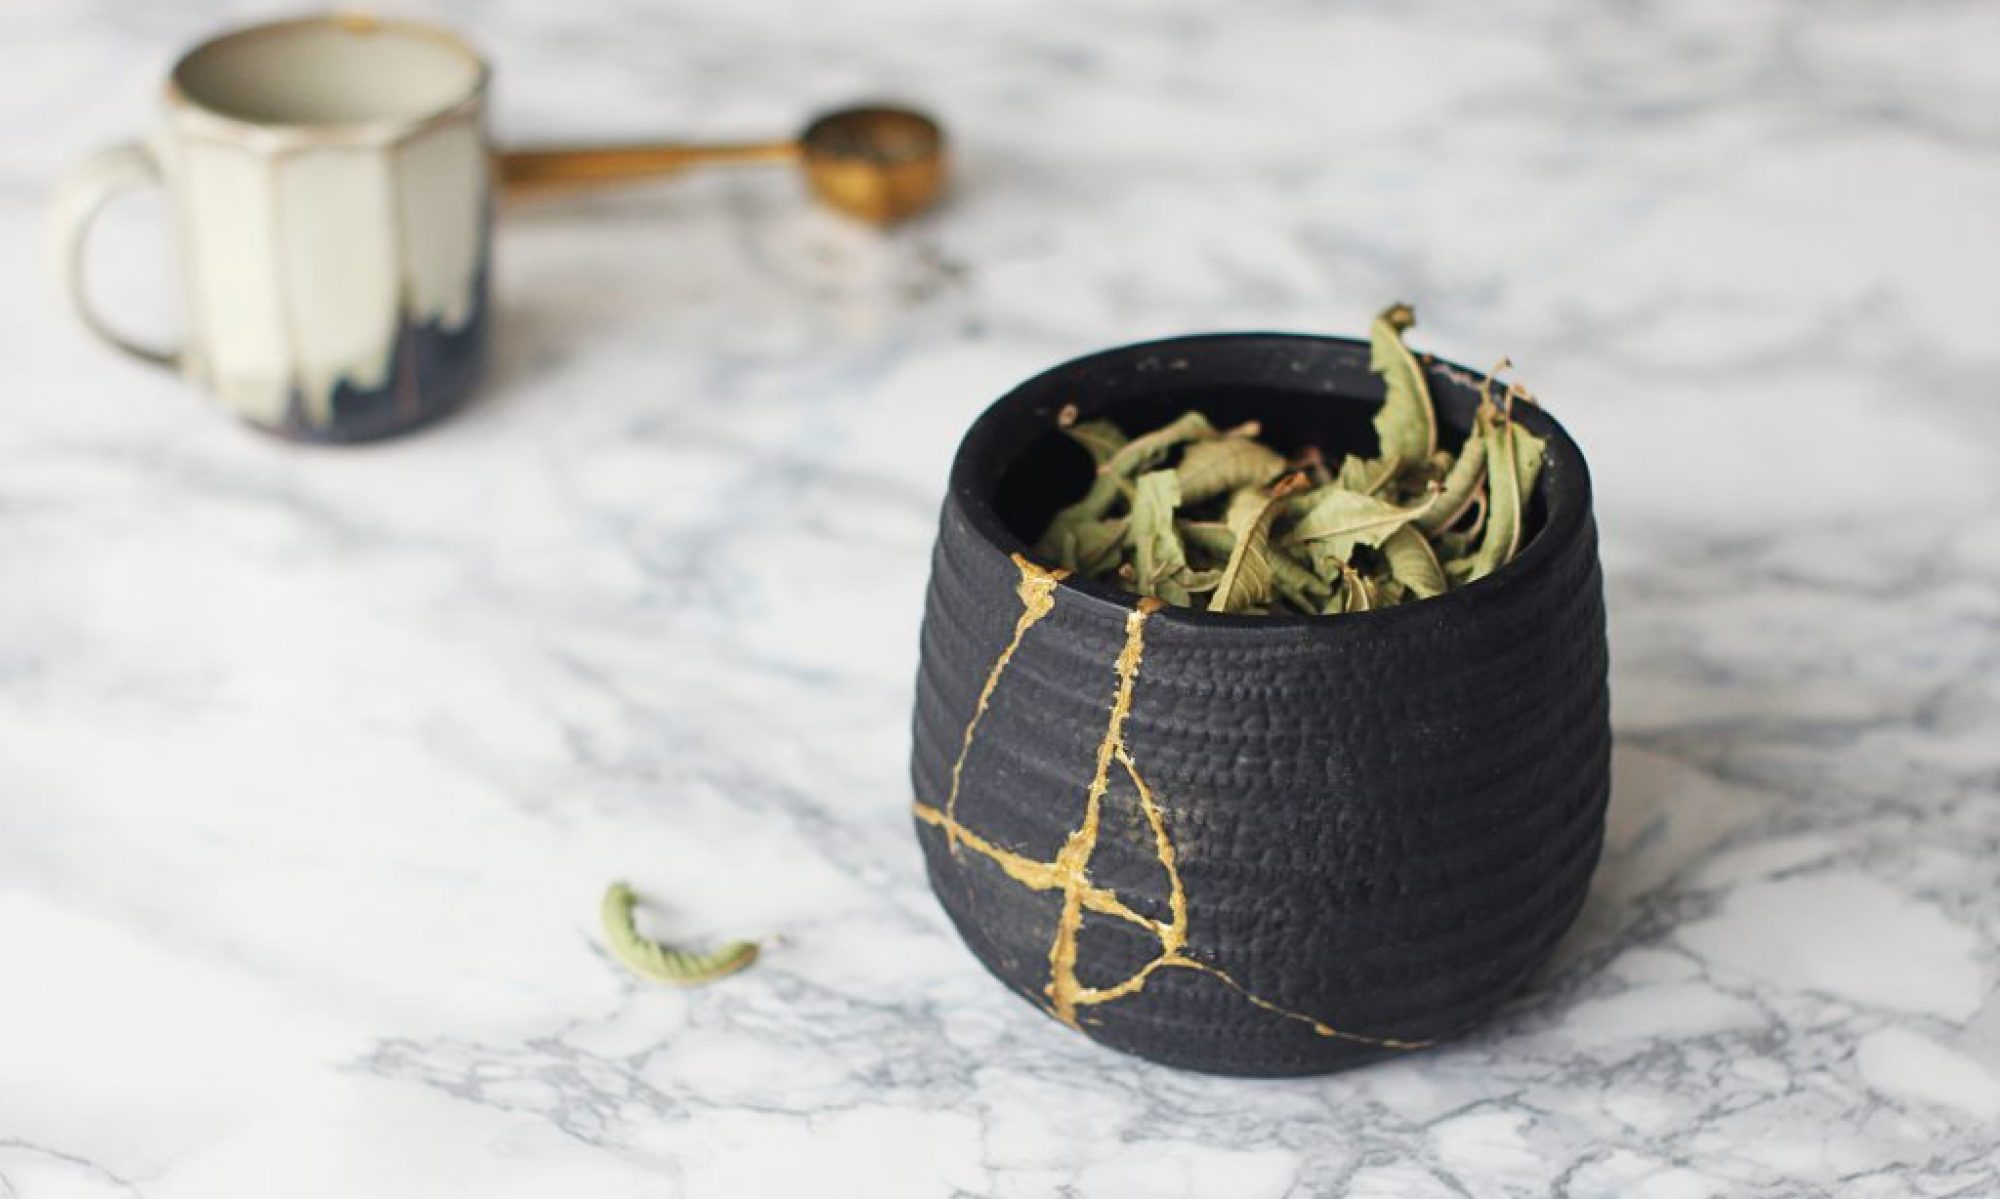
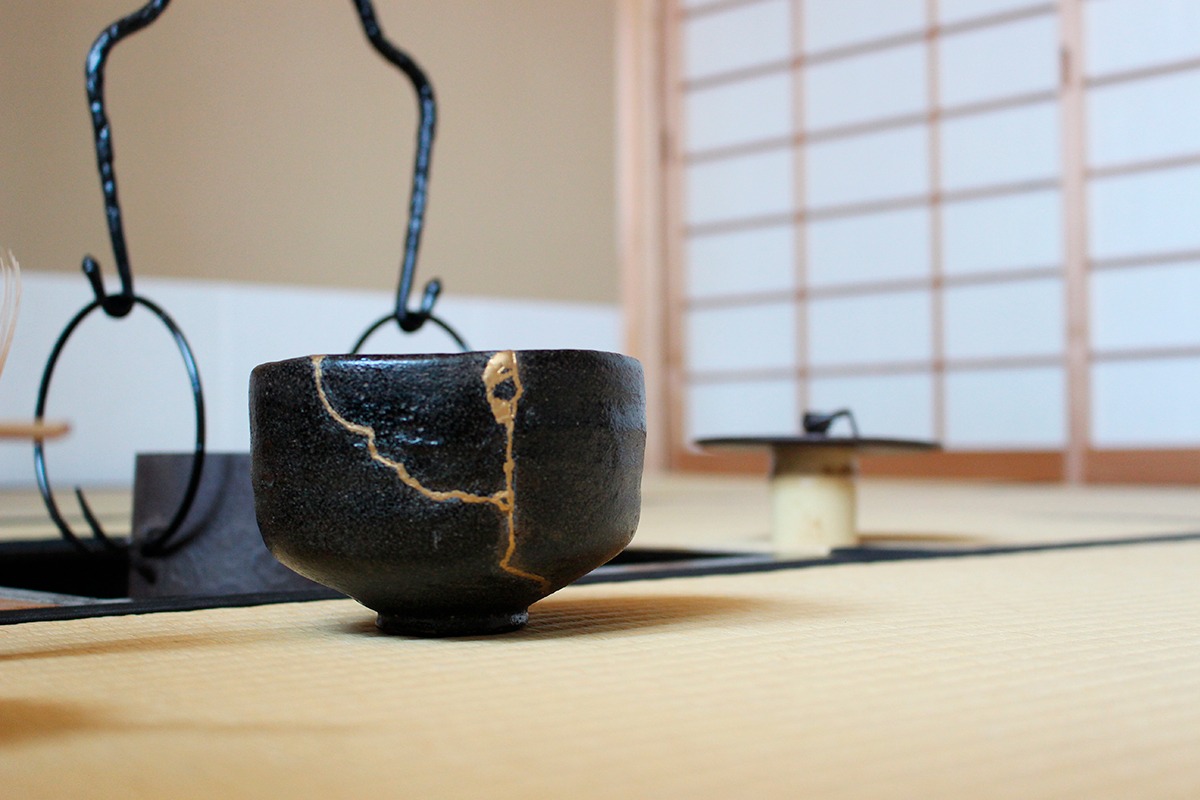
The traditional Kintsugi is a technique born in Japan which consists of repairing broken pieces of ceramic using a resin, called Urushi and metallic gold, silver or platinum powder. Once restored, the piece regains life and a new glow thanks to the scars that now give it a new light.
But let’s go further in the story.
Origin of the Kintsugi
History places the birth of this beautiful Japanese art at the end of the 15th century, when the Shogun in turn, Ashikaga Yoshimasa sent to China to repair his chawan, (special bowl for the tea ceremony), which unfortunately had been broken. After a few months the bowl was sent back to the Shogun who was very surprised and disappointed to see the work done as the bowl was repaired with an unaesthetic metal staples, making the whole set unsightly. Not being satisfied with it and wanting to get his bowl back, he looked to Japan for craftsmen who would offer him a better solution. The resulting work, along with the importance of the Tea ceremony contributed to the emergence of a new repair technique that ended up becoming the true and beautiful art that it is today.
It is suspected that some objects have suffered “premeditated accidents” in which ceramics have been broken (intentionally or strategically) to be able to decorate them with the Kintsukuroi.

¿How to do it?
Kintsugi or Kintsukuroi technique consists of joining pieces using Urushi lacquer of Japanese origin (made of resin from the Urushi tree that is only found in Asia), and sprinkled with gold, silver or platinum dust, using a kebo or makizutsu brush. This resin is also used for lacquering work on wood, for this reason the restoration technique is not only used with ceramic pieces, but also with wood.
At the end of the process, the piece comes to life even more beautiful, full of glowing scars.

Urushi
The word Urushi is used both to name the tree from which the resin is extracted, and the resin itself. This is extracted from the sap of the Rhusvernicifera tree, or in Latin, Toxicodendronvernicifluum, or simply, the Urushi tree. It is a tree found in the coastal areas of Japan, China, and Korea. There are several differences between this resin with other existing ones, one of them is that other resins come from insects such as mealybugs, in addition to the fact that urushi, by nature is a resin that is toxic to the touch. And also this resin or Japanese lacquer stands out for the exquisiteness and meticulousness when working it.
How is it obtained
The extraction or bleeding of the sap is carried out in summer, between the months of June and September and only in trees that are at least 10 centimeters thick and at least 10 years old. The craftsman makes several controlled cuts in the trunk, which produces approximately 250 milliliters of resin per year. When autumn arrives, the resin that is still bleeding loses quality, so the process stops until the following year. Natural sap is white in color, but when it comes into contact with air it changes its color and darkens, so it is stored in humid places protected from light. In order to use it, the sap undergoes a purification process where it is dehydrated and stained. The colors most used for dyeing are red and black, for which pigments such as cinnabar or iron oxide are added respectively.

In addition to being used for Kintsugi as an adhesive, it is also used as a finish on objects that want to give them a high quality glossy lacquered finish. In both cases the process is slow since it takes several successive layers, which have a long drying time so that it is properly consolidated. All this makes the value of the pieces worked increase their value and in some cases even being considered luxury objects. And in the case of objects worked with the Kintsugi technique, in pieces of great aesthetic value.
Traditional Kintsugi or Kintsukuroi process
Today there are new materials that can give a result similar to the classic with less effort and in much less time. There are also “Repair Kits” for one-time use, which is also acceptable if desired. However, some of us still prefer the old school since in addition to achieving a result closer to the desired one, it also brings us closer to that way of seeing life that such beautiful art entails.
The following steps closely resemble the traditional way developed in ancient Japan from development to use of materials.
Step 1: The accident
- Where everything starts, an accident and the object’s fracture.
- Collect the fragments.
- Imagine and define the way in which the repair will be taken and made.
Step 2: Assemble
- Clean the parts of the object and gather the tools to be used and very important, the use of gloves both for handling the part and for own protection..
- Preassemble the “puzzle” to locate the pieces.
- Prepare and apply the binder and join the pieces. And if a piece is missing, prepare aspecial mixture and fill in the missing space, shaping the lost piece.

Step 3: The wait
- Remove excess material with a tool and then clean it using essence of turpentine.
- Securethe pieces in place with tape or elastic.
- The binder should be allowed to dry, “breathe”, to dry and harden. Tradition calls for the use of a closed box with a towel and grid inside to place the piece. The approximate drying time can be between 7 and 14 days.
- At each step, the instruments should be cleaned with turpentine or vegetable oil and the material carefully stored for the next time.
Step 4: Repair
- When it dries perfectly clean the remains of the with a cutter and turpentine, then sand with fine sandpaper to smooth the surface perfectly.
- Check to the touch that the surface is perfectly flat as some irregularities are difficult to discern with the naked eye.
- Apply the following black lacquer and carry out the drying and sanding process mentioned above.
- Apply a red lacquer and this should only be allowed to dry for half an hour to be able to receive the final step.
Step 5: Reveal
- Put gold dust on a brush and lightly sprinkle it on the still sticky red lacquer. Once the powder is dry, collect it with the help of a brush and place the object in the box to dry and harden for two to three days.
- Once the hair spray has dried, run a silk cotton ball to remove excess dust and reveal the gold scars.
- Protect: apply a thin layer of protective lacquer to stabilize the gold and let it dry for 24 hours.

The final touch is to contemplate the object repaired and sublimated in all greatness, which will bear its golden scars with nobility.
All the previous steps are complex and long but very important since as long as they are respected they will increase the value of the restored piece. Applying the necessary binder for its perfect union, respecting the drying times, humidity and light conditions, the correct application of the lacquers as well as the gold dust in the appropriate quantity are details to take care of at all times, which together with patience and the taste for the process will result in a unique piece.